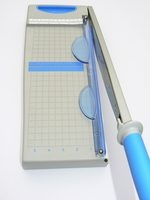
Tired of your paper getting a shredded edge?
No clean cuts and having to do one piece at a time?
Learn how to sharpen your own paper cutter and get back that nice clean edge you’ve been missing.
You can do it in just 4 easy steps.
Here are three of the steps to get you started:
Instructions
- Close the paper cutter's bladed swing arm. Hold the handle of the swing arm firmly in the down position with one hand while you remove the retaining bolt from the hinge side of the arm with your adjustable wrench. Grasp the frame of the arm and pull the swing arm free of the main body of the cutter. Be careful of the blade when handling the swing arm.
- Flip the swing arm so that the blade is facing upward and the beveled side of the blade is facing you. Slide the frame down into the bench mounted vise and close the vise so that its jaws grip the frame of the arm without obstructing the blade.
- Stand so that you are facing the end of the swing arm. Turn on your rotary tool's “Power” switch and bring it to full speed. Hold the tool at a 22-degree angle to the blade. Touch the spinning bit against the far end of the beveled side of the blade and pull it towards you while you maintain the same pressure and angle. Repeat this stroke until the edge of the blade is smooth and sharp.
See the last one and also the list of supplies you will need to do this: Paper Sharpening at E-How
Resource: E-How
Photo source: E-How
Now go sharpen all your paper cutters and stop putting up with ragged edges.
Happy Scrapping!
Team Scrapbooking Daily


