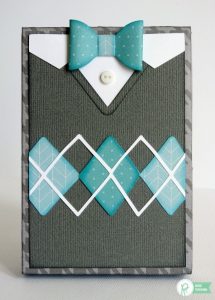
Learn how to align die-cuts for awesome projects.
Grab your die-cuts and make some wonderful cards for fall.
Here are 4 steps in the process. There are 7 steps all together.
Step 1: Â Die-cut approximately 22 diamonds from 4 to 6 different patterned papers. Â I chose to add chalk ink to the edges to make the diamonds pop against the background, but this step is optional.
Step 2: Loosely arrange the diamonds on an 4″ x 5.5″ kraft note card to determine pattern.
Step 3:  With the dies I used I measured that the diamonds would be placed 1″  apart from center tip to tip.  Carefully move diamonds off to the side maintaining your pattern.
Step 4: Since my note card was an even 4 inches and I needed them spaced 1″ apart this made calculations easy.  Using my pencil and ruler I marked every 1/2 inch at both the top and bottom and then lightly drew a line connecting them.  I also determined the middle and drew another perpendicular line.
There is also a picture or each step showing exactly how to do each one. Very helpful. Click Here!
These are just too cute.
Grab your die-cuts, scrap paper and get started!
Happy punching!
Team Scrapbooking Daily
Photo source: Pebblesinc blog
Resource: Pebblesinc blog


